


Flickr is a powerful platform for photographers and creatives, offering a space to share and organize your photos. Whether you’re a seasoned pro or just starting to build your portfolio, knowing how to upload and organize your photos effectively on Flickr can help you present your work in the best possible light. In this guide, we’ll walk you through the best practices for managing your photos like a pro.
1. Uploading Photos to Flickr
Before you can organize your photos, you need to get them onto Flickr. The uploading process is straightforward, but to make it easier to manage your photos later, follow these tips:
How to Upload Photos
- Go to Your Flickr Account: Open Flickr and sign in to your account.
- Click the Upload Button: On the homepage or your profile, click the upload icon (the cloud with an arrow) located at the top-right corner.
- Choose Your Photos: Select the photos you want to upload from your computer or drag them directly into the upload window.
- Adjust Upload Settings: Before completing the upload, make sure to adjust the privacy settings for each photo. You can set the photo to public, private, or restricted to specific people.
- Add Titles and Descriptions: For each photo, you can add a title and description to make it easier to identify later. This is especially useful if you plan to search through your photos by keywords or want others to understand the context of your image.
- Apply Tags: Tags are keywords you can assign to each photo, making it easier to search and organize your content.
Pro Tip: If you’re uploading a batch of photos, use the bulk upload option. Flickr allows you to upload multiple images at once, saving you time when managing large collections.
2. Organizing Photos into Albums
Albums are a great way to categorize and organize your photos based on themes, events, or projects. Here’s how to create albums and keep your photos well-organized:
How to Create an Album
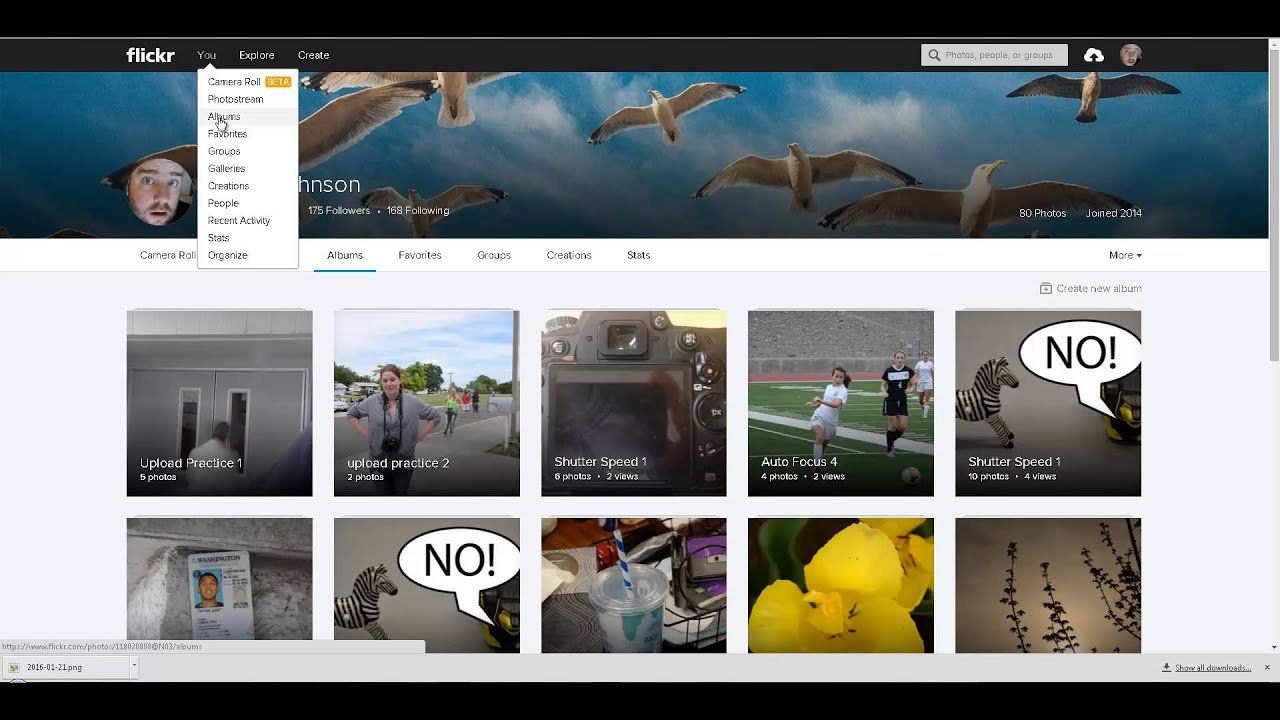
- Go to Your Photostream: Navigate to your Photostream, where all your uploaded photos are displayed.
- Click on the “Albums” Tab: On your profile page, click the “Albums” tab. This is where all your albums are stored.
- Create a New Album: Click the “Create a New Album” button, and choose the photos you want to add to the album. You can select photos from your Photostream or directly from the upload process.
- Name Your Album: Give your album a descriptive title that reflects the theme of the images inside. You can also add a description to provide more context to viewers.
- Add More Photos Later: You can always add more photos to your album later by clicking “Add Photos”.
Pro Tip: If you have multiple projects or events, consider using sub-albums to break down larger albums into smaller, more manageable categories.
3. Using Tags for Better Searchability
Tags are keywords that make it easier to search for and group your photos. By tagging your images with relevant terms, you ensure that your photos are discoverable by others, and you also make it easier to find them in your own collection.
How to Add Tags
- Tag During Upload: After uploading your photos, you can add tags during the upload process. Simply type in the words that describe the photo (e.g., “landscape,” “black and white,” “sunset”).
- Edit Tags Later: If you want to add or change tags after uploading a photo, go to the photo in your Photostream, click the “Edit” button (pencil icon), and add or modify the tags.
- Use Descriptive Tags: Think about the words people would use to search for images similar to yours. Tags like “nature,” “portrait,” or “macro” can help categorize your work.
Pro Tip: Use a combination of broad and specific tags for better discoverability. For example, if you’ve uploaded a picture of a beach at sunset, you could use tags like “beach,” “sunset,” “ocean,” and “vacation.”
4. Sorting and Grouping Photos
Flickr offers various ways to sort and group your photos, making it easier to manage large collections.
How to Sort Photos
- Sort by Date: In your Photostream, Flickr will automatically display your photos in chronological order. You can also change the view to show your latest uploads or oldest images.
- Sort by Title or Tags: To find specific photos quickly, you can sort them by title, tag, or date added. This is especially useful when you have a large number of photos uploaded.
Pro Tip: When organizing your photos into albums, think about how others might navigate your collection. Create logical categories (e.g., “Portraits,” “Landscapes,” “Travel,” or “Events”) that make it easy to browse your work.
5. Using Collections for More Advanced Organization
For users with large portfolios, Flickr offers Collections—a way to organize multiple albums under a single heading.
How to Create a Collection
- Navigate to Albums: Go to your Albums tab.
- Create a New Collection: Click “Create a New Collection” and give it a name.
- Add Albums to the Collection: Once your collection is created, you can add multiple albums to it, which allows for more layered and structured organization.
Pro Tip: Collections are great for professional portfolios. For example, you can create a collection called “Weddings,” with albums for each individual wedding or series of images.
6. Privacy and Sharing Options
Flickr allows you to control the privacy of each photo and album. It’s important to set these options according to who you want to share your photos with.
How to Set Privacy
- Individual Photos: You can set privacy for individual photos during the upload process or by editing the settings later.
- Albums and Collections: Set the privacy of entire albums or collections to control who can view them. You can choose between public, friends, family, or private settings.
Pro Tip: If you want to share specific photos with a small group, consider creating a private album and sharing it with only those people. You can also make albums public when you’re ready for a wider audience.
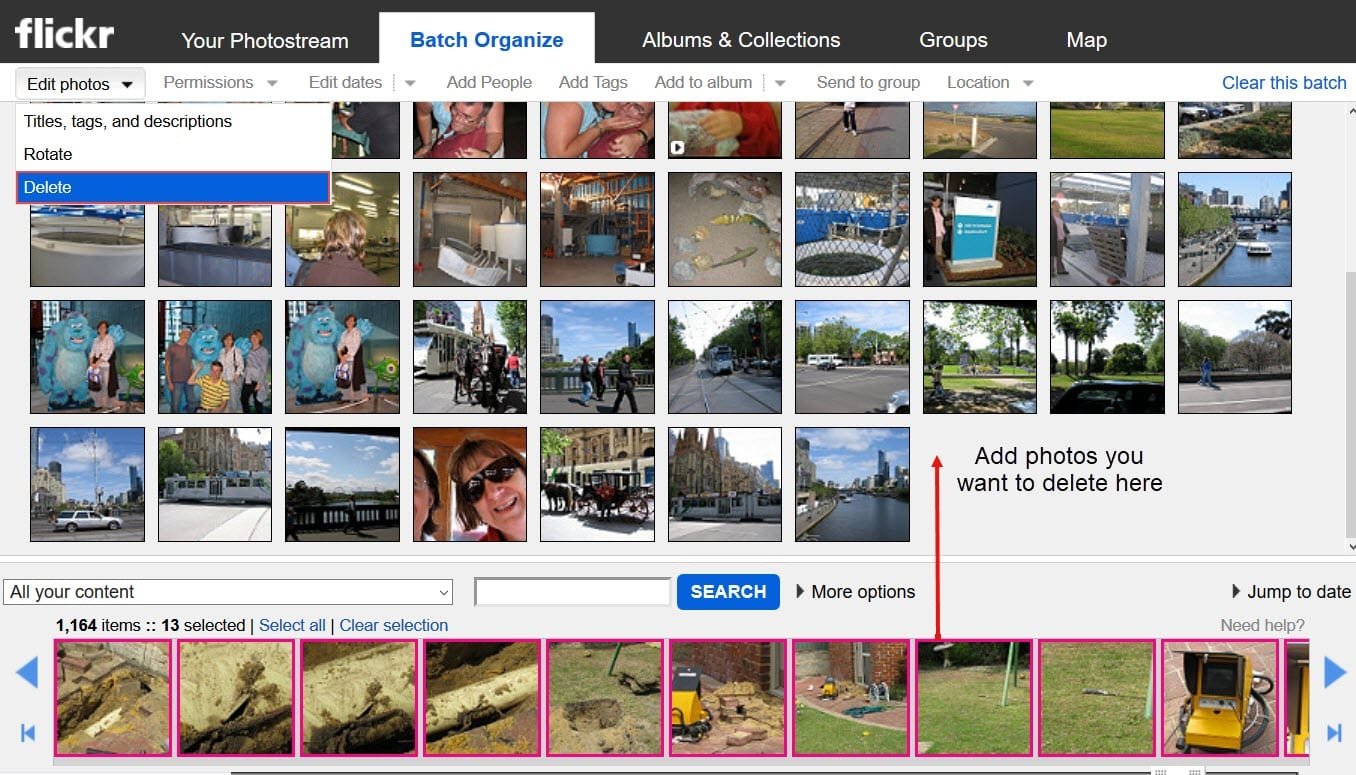
7. Regularly Review and Update Your Photos
Maintaining an organized Flickr account is an ongoing process. As your photo collection grows, you’ll want to regularly review and update your albums, tags, and privacy settings.
Pro Tip: Set aside time once a month to clean up your account. You can reorganize albums, add new photos to existing collections, and make sure your tags are relevant.
Conclusion
Uploading and organizing your photos on Flickr doesn’t have to be a chore. By using albums, tags, and collections, you can keep your photos easily accessible and well-presented. Whether you’re building a professional portfolio or just sharing your work with friends and family, Flickr offers powerful tools to help you stay organized. Use these tips to manage your photos like a pro, and you’ll be able to showcase your work in the best possible way.